Featured Content

AI Agent Skills: Stop Paying for Tokens You Don't Need
AI agent Skills replace bloated instruction files with on-demand context loading — cutting token waste by 80% for Excel and Power Query workflows.
AI Agent Skills: Stop Paying for Tokens You Don't Need
AI agent Skills replace bloated instruction files with on-demand context loading — cutting token waste by 80% for Excel and Power Query workflows.

KPI Tree for Performance Management: A Visual 7-Step Guide
KPI Tree for Performance Management: a practical 7-step method to align strategy with KPIs, cut metric overload, and create dashboards people actually use.

Why Your BI Team Needs a Product Mindset, Not Just Reports
Discover why developing a BI team product mindset is essential for building compounding value. Learn how to shift from reactive reporting to strategic product thinking.

DAX and UDF SVG Charts in Power BI: Complete Guide
Learn to build DAX and UDF SVG charts in Power BI with this complete guide. Create custom visualizations using pure DAX code with dynamic scaling and conditional formatting.

DAX + UDF = the React of Power BI
Learn how to combine Power BI DAX user-defined functions with HTML visuals to build reusable KPI cards, tables, and progress bars that wow report stakeholders.

Automating Power BI Themes with Fabric, Notebooks and BIBB Theme Generator API: A Complete Guide
Learn how to automate Power BI report theme updates using Microsoft Fabric, Python, and the BIBB Theme Generator API for seamless theme management.

What is a Template in Power BI? Settling the debate.
Understand what each Power BI Template type does, when to use it, and how it shapes the user experience.

Improving BI User Experience in Corporate Environments: Practical Strategies That Work
Discover actionable techniques for improving BI user experience in corporate environments, focusing on user personas, training, and documentation.

Data Exfiltration in Power Query - Understanding the Risk and Protections
Data Exfiltration in Power Query: Understanding the Risk and Protections

Automation of the 'Meet the Team' PDF Slides with Power BI
Automate 'Meet the Team' PDF slides using Power BI, SharePoint, and Power Automate to save time, ensure consistency, and scale across proposals.
PnP PowerShell for SharePoint for Power BI Users

As a Power BI professional, I often interact with SharePoint as one of the primary data sources. However, managing and manipulating SharePoint data can become challenging, especially when dealing with large data sets.
In this blog post, I will dive into a script I created that serves two purposes: start with PnP PowerShell for SharePoint for Power BI users and create test (and production) SharePoint lists.
Now let’s walk through the script that creates a new SharePoint list, fills it with random elements, counts them, and deletes them.
PnP PowerShell for SharePoint for Power BI users - complete implementation code
PnP PowerShell for SharePoint for Power BI users Script Breakdown
1. Opening PowerShell
I always run the PowerShell ISE (x86) version as an administrator.
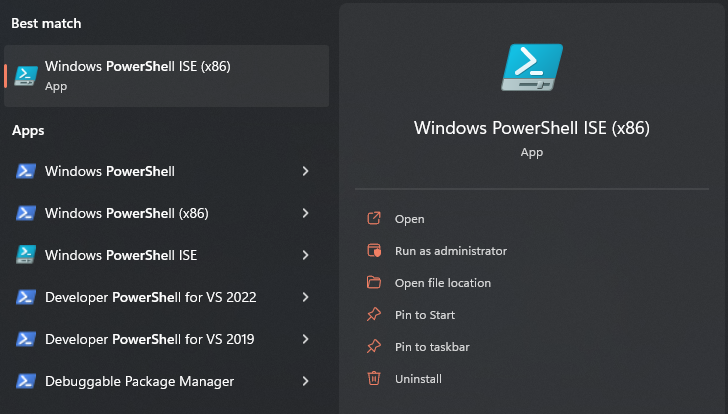
Opening PowerShell ISE
2. Installing PnP PowerShell
If this is your first time using PowerShell, you must install it.
This command installs the PnP PowerShell module, which provides all the necessary cmdlets for managing SharePoint Online.
3. Define Variables
In PowerShell, variables are defined using a dollar sign $ followed by the variable name. There’s no need to declare the variable type; PowerShell will automatically determine the type based on the assigned value.
4. Connecting to SharePoint
In this section, we first connect to the SharePoint site using Connect-PnPOnline. The -UseWebLogin parameter specifies that we should authenticate using a browser pop-up. However, there are other authentication methods as well. For instance, if we have a username and password, we could use the -Credentials parameter. There are many other parameters available, such as -Interactive for an interactive login experience, -PnPManagementShell to use the PnP Management Shell multi-tenant application, and -SPOManagementShell to use the SharePoint Online Management Shell multi-tenant application.
5. Creating a New List
The New-PNPList command creates a new list in SharePoint using the specified list name and the “genericlist” template. The -OnQuickLaunch flag adds the list to the site’s quick launch for easy access.
6. Adding Fields to the List
In this script portion, we add new fields to the SharePoint list using Add-PnPField. The -Type parameter determines the data type of the new field. In our case, we are creating text fields for “Color” and “Animal” and a user field for “Owner”.
SharePoint supports several types of fields, some of which include:
- Text: A basic text field
- Note: A field for longer texts
- Number: A field for numeric values
- Currency: A numeric field that represents currency
- DateTime: A field for date and time
- Choice: A field where the user can choose from a pre-defined set of choices
- Lookup: A field that allows users to look up values from another list
- Boolean: A field representing True/False values
- User: A field to represent a user or group
7. Filling in the List with Random Elements
We use a for loop to populate the list with random elements. In each iteration of the loop, Get-Random is used to pick a random ‘Color’ and ‘Animal’ from predefined choices. Then Add-PNPListItem creates a new list item with these random values and a static ‘Owner’ value.
The $i -le $total condition in the for loop specifies that the loop will continue as long as $i is less than or equal to $total. As $i increments with each iteration, the loop will run exactly $total times.
The Write-Progress command visually represents the script’s progress in the PowerShell console. It uses the calculated $currentProgress percentage to update the progress bar after adding each new item.
8. Deleting All Elements from the List
We delete all items from the list using the Remove-PnPListItem command. We use a foreach loop to iterate through all items in the list.
The try block contains the code that could cause an exception, such as when trying to delete an item that doesn’t exist. If such an exception occurs, the code in the catch block is executed. In this case, it writes an error message to the console.
By utilising try and catch, we can handle errors gracefully, ensuring our script can continue running even when minor errors occur.
9. Deleting the List
Finally, we will delete the list; for this, we use Get-PnPList to verify if the list exists, and if it does, Remove-PnPList to delete the list.
Key Benefits for Power BI Users
This script provides several advantages for Power BI professionals:
- Automated Test Data Creation: Quickly generate SharePoint lists with sample data for testing Power BI reports
- Consistent Data Structure: Ensure your test environments have predictable data structures
- Easy Cleanup: Remove test data and lists when no longer needed
- Scalable: Easily adjust the number of items created by changing the
$totalvariable - Error Handling: Robust error handling ensures the script continues running even if individual operations fail
Conclusion
PnP PowerShell is a powerful tool for Power BI professionals who work with SharePoint data sources. This script demonstrates how to automate common SharePoint management tasks, making it easier to create test environments and manage data for your Power BI projects.
Whether you’re setting up test data for development or managing production SharePoint lists, these PnP PowerShell techniques will help streamline your workflow and ensure consistent, reliable data management practices.
Thank you for taking the time to read this post. I hope that the information provided has been helpful and informative. Please feel free to share your thoughts and experiences in the comments section below.
Comments
Share your take or ask a question below.