
Featured Content

Power Query for Excel Users — New Book
12 real workplace scenarios. Every chapter ends with a deliverable. Follow Quinn from messy exports to a working data model. Published by Packt.
bibb Analytics: Designing Measurement Like a BI Problem
The same framework we apply to client BI work applies here: goals first, layers second. Here is the strategy behind bibb.pro's analytics.
bibb Analytics Build in Public: Introduction
bibb.pro had GA4 running since day one. Events were firing. Data was collecting. But without a strategy, that is noise with a database attached. This series documents fixing that.
Git for Power BI and Fabric Users: A Beginner's Guide
Power BI and Fabric development is moving toward programmatic workflows. Here is what Git is, how to install it on Windows, and how to use it as a BI or Fabric developer.
6 Power BI Modern Button Slicer UI Patterns for Better Dashboards
Learn 6 Power BI Button Slicer UI patterns to build modern dashboards: segmented controls, tabs, KPI cards, toggle buttons, and more.
Salesforce Power BI Integration: A Practical Comparison Guide
Salesforce Power BI integration done right: compare native connectors, custom API, and the Metrica connector to choose the best approach for your team.

How to Design Better KPIs Before They Mislead You
How to design better KPIs starts with knowing what your formula isn't measuring. A real BI case study in dashboard blind spots, with DAX examples and a fix.

AI Agent Skills: Stop Paying for Tokens You Don't Need
AI agent Skills replace bloated instruction files with on-demand context loading — cutting token waste by 80% for Excel and Power Query workflows.

KPI Tree for Performance Management: A Visual 7-Step Guide
KPI Tree for Performance Management: a practical 7-step method to align strategy with KPIs, cut metric overload, and create dashboards people actually use.
Why Your BI Team Needs a Product Mindset, Not Just Reports
Discover why developing a BI team product mindset is essential for building compounding value. Learn how to shift from reactive reporting to strategic product thinking.
DAX and UDF SVG Charts in Power BI: Complete Guide
Learn to build DAX and UDF SVG charts in Power BI with this complete guide. Create custom visualizations using pure DAX code with dynamic scaling and conditional formatting.
Connecting Clockify to Power BI: Three Integration Patterns That Work

I made the Clockify Power BI repository public in early 2021; by this time I had been tracking my time in Clockify for about two years and had a very good understanding of Clockify’s API. Building a custom connector felt like something the community would use.
Since then a question I get often is: What is the best way to connect Clockify to Power BI?
There is no single best way. There are three, and each one is a real answer depending on how much of the work you want to own.
Three patterns to connect Clockify to Power BI
The three patterns are not competing. They sit on a line that runs from full control to zero effort.
- Pattern A: you write the API calls yourself in Power Query.
- Pattern B: you install the custom connector and pick tables from a menu.
- Pattern C: you open the finished template.
Everyone lands on one of them. Here is the trade-off.
The same Clockify API key feeds all three.
The column that catches people out is Service refresh. A custom connector does not run in the Power BI Service on its own. The other two do.
Start with the pattern that teaches you the most.
Pattern A: Call the Clockify API yourself
This is the route with no connector and no template. You open a blank query and talk to the Clockify REST API (application programming interface) directly through Power Query.
It is the most work. It is also the one that teaches you the most, and it refreshes in the Power BI Service with nothing installed, because it is only Power Query code inside your report.
You need three things: the base address, the authentication header, and a way to page through results.
Authenticating the call
Clockify authenticates with an API key that you generate in your profile settings, under the API section. Treat it like a password.
The key travels in a request header called X-Api-Key. Here is a minimal authenticated call that lists your workspaces.
let
    ApiKey = #"Clockify API Key",  // a Power Query parameter, never hardcoded
    Source = Json.Document(
        Web.Contents(
            "https://api.clockify.me/api/v1",
            [
                RelativePath = "workspaces",
                Headers = [ #"X-Api-Key" = ApiKey ]
            ]
        )
    )
in
    Source
Keep the key in a Power Query parameter. If you paste it straight into the M code it will end up in a shared file or a screenshot eventually.
Paging through results
Clockify returns 50 records per page by default. You control it with two query parameters, page, which starts at 1, and page-size. Every paginated response also carries a Last-Page header that reads true on the final page.
The pattern is a List.Generate loop that keeps requesting pages until it gets an empty list back. Remember, #MisForMagic, and the loop is the fun part.
Pages = List.Generate(
    () => [ Page = 1, Data = GetPage(1) ],
    each not List.IsEmpty([Data]),
    each [ Page = [Page] + 1, Data = GetPage([Page] + 1) ],
    each [Data]
)
If you want a full, working version of this for every Clockify endpoint, read the connector source. That is exactly what it does.
New to Web.Contents? Start with the Power Query Web.Contents cheat sheet.
Pattern A is the right call when you want one specific report, when you want to learn how the API and M paging actually work, or when you need to shape the data in a way a generic connector would not. It is the wrong call as a team standard, because the next person has to read all of your M code before they can change anything.
Once you have written that paging loop for the third time, you will want it in a box. That box is the connector.
Pattern B: The custom connector
The custom connector packages the paging and authentication code into a single file with a .mez extension. You drop it in a folder, and Clockify appears in the Get Data list next to SQL Server and SharePoint.
There is no Power Query code to touch. The connector exposes one function, Clockify.Contents, which returns a navigation table. From the navigator you tick the tables you want: Workspaces, Users, User Groups, Projects, Time Entries, Clients, Tags, Tasks, and two Custom Fields tables.
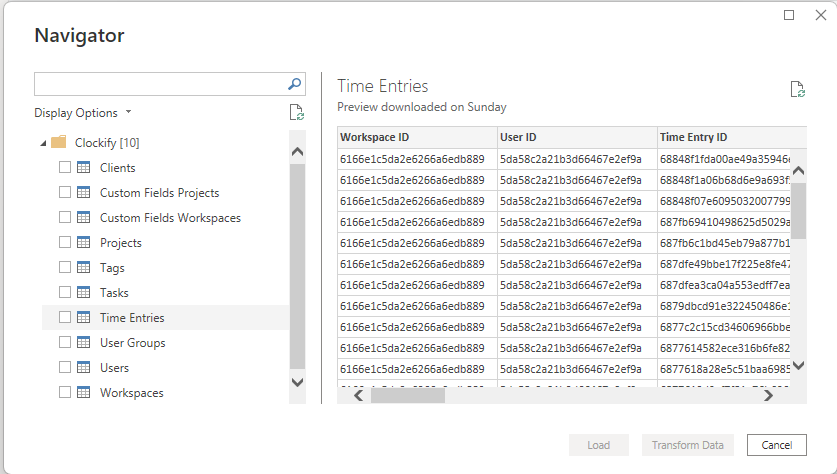 The navigator after connecting with the Clockify connector. Tick the tables you need and load.
The connector is open source. The full code lives in the Clockify-PowerBI repository.
Get the connector
There are two ways to get the .mez file, and they produce the same result.
Build it from the repository. Clone the repo, install the Power Query SDK (software development kit) extension for Visual Studio Code, open the Clockify folder, and run the Power Query SDK: Build command. The .mez lands in bin/AnyCPU/Debug/. Do this if you want to read the code or change something before you use it.
Download the pre-built file. It is free for newsletter subscribers.
However you got the file, using it is the same.
Use the .mez connector in Power BI Desktop
- Copy
Clockify.mezintoDocuments\Power BI Desktop\Custom Connectorson the machine that runs Power BI Desktop. Create the folder if it is not there. If OneDrive syncs your Documents folder, the real path may be underC:\Users\<you>\OneDrive\Documents\Power BI Desktop\Custom Connectorsinstead. - If you downloaded the file, right-click it, choose Properties, and tick Unblock if that option shows. Windows blocks files that came from the internet, and a blocked
.mezwill not appear in Get Data. - In Power BI Desktop, go to File, then Options and settings, then Options, then Security, then Data Extensions, and allow any extension to load.
- Restart Power BI Desktop.
- Get Data, search for Clockify, connect, and paste your API key when asked.
Why the .mez file has to live on your machine
A custom connector is code that lives on your machine, not something inside the report file. Power BI Desktop only loads connectors from the Custom Connectors folder in your local Documents directory, and it reads that folder fresh every time it starts. There is no cloud copy and no upload step.
Microsoft’s connector extensibility documentation says it directly: to use an uncertified custom connector you “copy the connector file (.pq, .pqx, .m, or .mez) into your user Documents-scoped custom connectors folder” and then restart Power BI Desktop. Because it is uncertified code that can handle your credentials, Power BI keeps it blocked until you lower the Data Extensions security setting or the connector is signed with a trusted certificate.
The practical consequence: every person on your team who opens the report needs the .mez file in their own folder, or Clockify tables will not refresh for them. The same local-file limit is why scheduled refresh in the Power BI Service needs the connector installed on an on-premises data gateway, covered below.
Running a self-hosted Clockify? Clockify.Contents takes an optional API URL. Leave it blank for the cloud service, or pass your full API base address, which is your login host followed by /api/v1.
Note: “Allow any extension to load” is a machine-wide setting. That is fine on your own laptop. In a locked-down corporate environment you may need IT to sign the connector or approve it first.
What the 2026 rebuild changed
The connector ran on the same core code from 2021. In September 2026 I rebuilt it.
The reason was a bug I had shipped for four years. Only the Time Entries table paged through results. Every other table fired a single oversized request, and Clockify caps those without telling you. Any workspace with more than a couple hundred projects, users, or tags was quietly losing rows, with no error to point at.
The rebuild fixes that. Every list endpoint now pages correctly. It also:
- Collapses the old ten functions into the single
Clockify.Contentsentry point. This is a breaking change. If you used the old connector, reconnect through the navigator and repoint your queries. - Retries automatically, with a backoff, when Clockify returns a rate-limit response.
- Moves the build from the retired Visual Studio SDK to the Visual Studio Code Power Query SDK.
The full changelog is in the repository README.
One thing the rebuild does not fix, because it cannot. A .mez connector does not run in the Power BI Service’s scheduled refresh. For that you need an on-premises data gateway with the .mez file installed on it. If that is a problem, Pattern C is the answer.
Pattern C: The ready-made template
The template is a paid Power BI file that is already built. Not raw tables, a finished report.
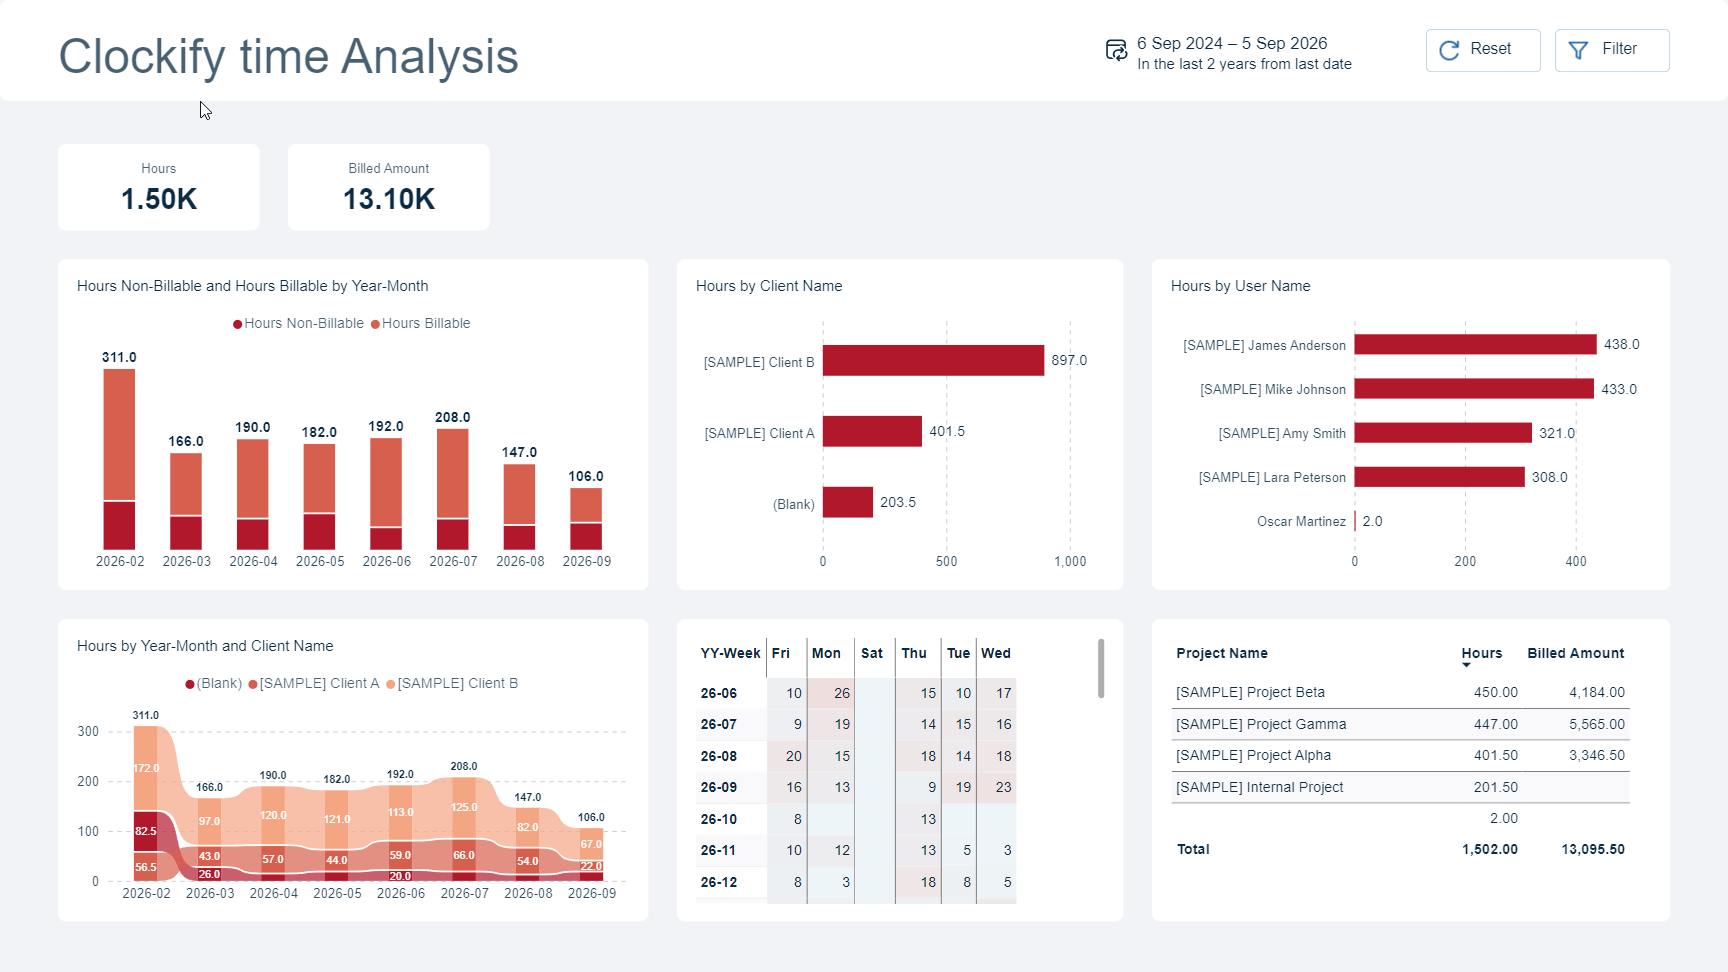 One page of the Clockify Power BI Template. The model and measures are done; you open it and connect.
Inside it:
- A star schema with a marked date table and clean relationships.
- A library of DAX (Data Analysis Expressions) measures covering volume, billable hours, and time intelligence.
- A multi-page report.
- Full compatibility with the bibb.pro Theme Generator, so you can restyle the whole thing in a few clicks.
It connects with inline Power Query, the same Web.Contents approach as Pattern A but already written and shaped. That means it refreshes in the Power BI Service with no gateway.
Pick the template when you want the report this week and not the build project, or when you want a well-structured model to learn from. It is a one-time purchase with lifetime updates.
One key, three destinations
Build Pattern A when you want to understand how the API and M paging work. Install Pattern B when you want Clockify in your Get Data list and then never think about it again. Buy Pattern C when you want the report finished today.
The connector source and its issue tracker are on GitHub. The template is on the store.

Comments
Share your take or ask a question below.